Prologue
We kicked around the greenhouse idea for quite a while. Our first
experience with a greenhouse was a kit I bought off the internet. It was
a simple thing and I thought it might get us by. What a POS that was.
The panels were corrugated plastic that kept blowing out in strong breezes. After farting
around with it for one season, I put it up on Craigslist for free. Good riddance.
I retired this past summer, and now it was time to build one myself. Hell, anything I would build would be worlds better than that little cracker-box kit I wasted money on at first.
Almost everyone that has ever searched around the internet for greenhouse design ideas has seen the Ana White greenhouse design. It's a gambrel 'barn shape' that always seems to be a favorite because of the open interior space. Ana's design is also one that is free to use, which also adds to its popularity. It's also pretty easy and makes efficient use of materials. If you follow Ana White's design exactly, you'll have very little left over when your project is finished.
Of course, I hardly ever follow anyone's design exactly, and this was no exception.
Pre-project Considerations
Costing materials - Like I said, the original Ana White design is very efficient with material usage. Any modifications with add materials and costs to your project. I had to add an extra sheet of clear roofing, as well as extra closure strips and screws. Actually, I think I added a lot of things.
Brands are not alike! I started out with the stupid assumption that the closure strips I bought at Lowes would work with clear panels from Home Depot. The Lowes closure strips are Tuftex brand, but the clear panels at Home Depot are Suntuf brand. They look the same, but I assure you they are not. Bottom line: make sure your closure strips match your clear panels!
Brand lengths - Speaking of closure strips, of you buy the Tuftex product at Lowes you are going to get 72" wooden strips. Not sure what they have in the way of foam. If you shop Home Depot, however, your wood Suntuf closure strips are 24" long and the white foam ones are 36" long. Isn't that nuts? Get out your calculator! Also, consider that the starting points and stopping points of the humps and valleys to ensure you have enough after trimming.


Wooden or Foam? Wooden closure strips are great for sturdiness. I chose to use wooden strips where I thought there might be a possibility of a ladder leaning against it or some other weight applied. The down side I to the wooden strips is, you must pre-drill every one before screwing them down or they'll split, and they don't fit nearly as snugly against the roofing as the foam closure strips do. You may need caulking in some areas depending on how much you care about gaps. The foam strips fit so nice and snug into the clear panels that they likely won't need any caulking. They even lock together like a jigsaw puzzle and still have matching spacing. Also, if you're wondering about density, the white foam stuff has tiny cells, so it's very dense--hardly squishable. Check out the perfect fit:

Save Those Pieces - When you are trimming or cutting your foam closure strips, be sure to save the scraps. They come in handy for stuffing any voids you have before you run caulking around.
Construction


After building the front and back I was pleasantly surprised when they fit together perfectly, with no hammering or any other "assembly influence" required. It really felt like I was getting somewhere.


 I don't think it was the smartest thing in the world to be working on an long-running project during July when we were in the midst of a heat wave, but that's how I roll I guess. I took lots of breaks and fell in love with carbonated water in cans. Wow, to pop one of those and feel that cold, fizzy burn down your throat on a hot day can really be game-changer!

As far as framing went, I made some modifications. I decided to put a couple of louvered intakes on the front side, with a fan mounted up high on the back wall. I made the fan framing using my Kreg screw fixture, and it slid right into place. Here's what I came up with when it was all said and done:

As you can see I used steel plates instead of making my own gussets from plywood. Because we were deep in the throes of the Covid-19 marketplace the lumber prices were going through the roof. at one point I saw 1/2" plywood for sale at Lowe's for $99.94 per 4' x 8' sheet! (no, I didn't buy anything there that week.) I haven't tallied the numbers yet, but I think I bought so many of those plates it wouldn't have mattered as far as saving money, but buying them was helluva lot easier than having to cut buttload of them from scratch.
The main modification I made was over the original roof design the Ana White greenhouse had, deciding to build roof skylight/vents. I did a lot of research on the internet about pros and cons of various designs of roof vents, and decided I'd just build my own. All I did was build a "box" for each one out of 2x4's and screwed them each into place. I didn't get any pictures of that particular step, but there wasn't really much to it anyway. The hardest part was measuring and deciding what their locations would be, how the roof splices would work best, would there be pivot interference, etc. I did a lot of planning, clamping, measuring and experimenting, and finally figured out where I wanted to place them.
Paint

With the framing of the greenhouse finally complete, it was ready for paint. In retrospect, I should have toned down the shade of white a couple of notches. I chose Valspar SeasonFlex because it's a good 100% acrylic, but the shade was Ultra White. They weren't kidding... that stuff is white! Imagine painting and building on and around something this blindingly white all the while under bright sun! Let me tell you, I shed a few tears from the sun and heat while I was painting it all. The good thing about that wildly-white paint is the coverage--it has so much pigment in it (it's primer and paint both) that it covered everything with one coat. Even dark, mill-printed logos covered easily. I was glad, too, because I would have hated to have to do that again. Maybe in the dark next time...
Steel Walls
Time to mess with the steel walls. Of all the parts of the greenhouse to be bought and transported, the steel panels were my least favorite. Of course, most of my problem with them was because I was operating solo, and 12' panels of steel are both heavy and floppy. Fortunately, once they were here at home they were easy to install. The screws bit through them like butter. All that was required on each of the two sides were just some clamps to situate them, and screw em down. With the two ends, however, I had to place, clamp, mark, cut, and re-place. I tried an air-powered abrasive wheel cutter at first, but I found the noise, grit, and the the actual cutting itself to be a pain-in-the-ass to deal with. I opted for sheet metal shears instead.


 |
| Straight cut |
 |
| Offset |
So, that puts us here, with a complete lower surround wall. I assembled the corners using foam closure strips and screws.


Here you can see the fan framing I built on the back wall with the Kreg fixture:


Clear Panels
I had been looking forward to putting the clear panels up for some reason. I don't know why. Maybe it had something to do with how light and rigid they were, and so easy to work with. At the same time, I was dreading all the drilling I had to do on the wood closure strips to keep them from splitting. As I got underway I was surprised at how easy everything went.


Until it didn't.
Getting up near the new skylights I had to be doubly-careful about stopping and starting points of each sheet so they didn't cause a problem with seams being in the wrong place and causing a caulking nightmare. I measured often and used scraps to help with fit and overlap. When it was all said and done my goal was to have a nice clear, seamless center cap. I don't mind saying, cutting and fitting around the skylight boxes was a hassle, but I asked for it. It was like some sort of patchwork puzzle.
Side note: As much of a total pain-in-the-ass the skylights were as far as heaping extra cautions and problems into my build, they came in super handy as I installed the clear roofing all over the top. I was able to work through the skylights instead of figuring out some way to lean way over the roof from the outside.


With all the roof patchwork complete, I admired the "finished" roof.

The Skylights
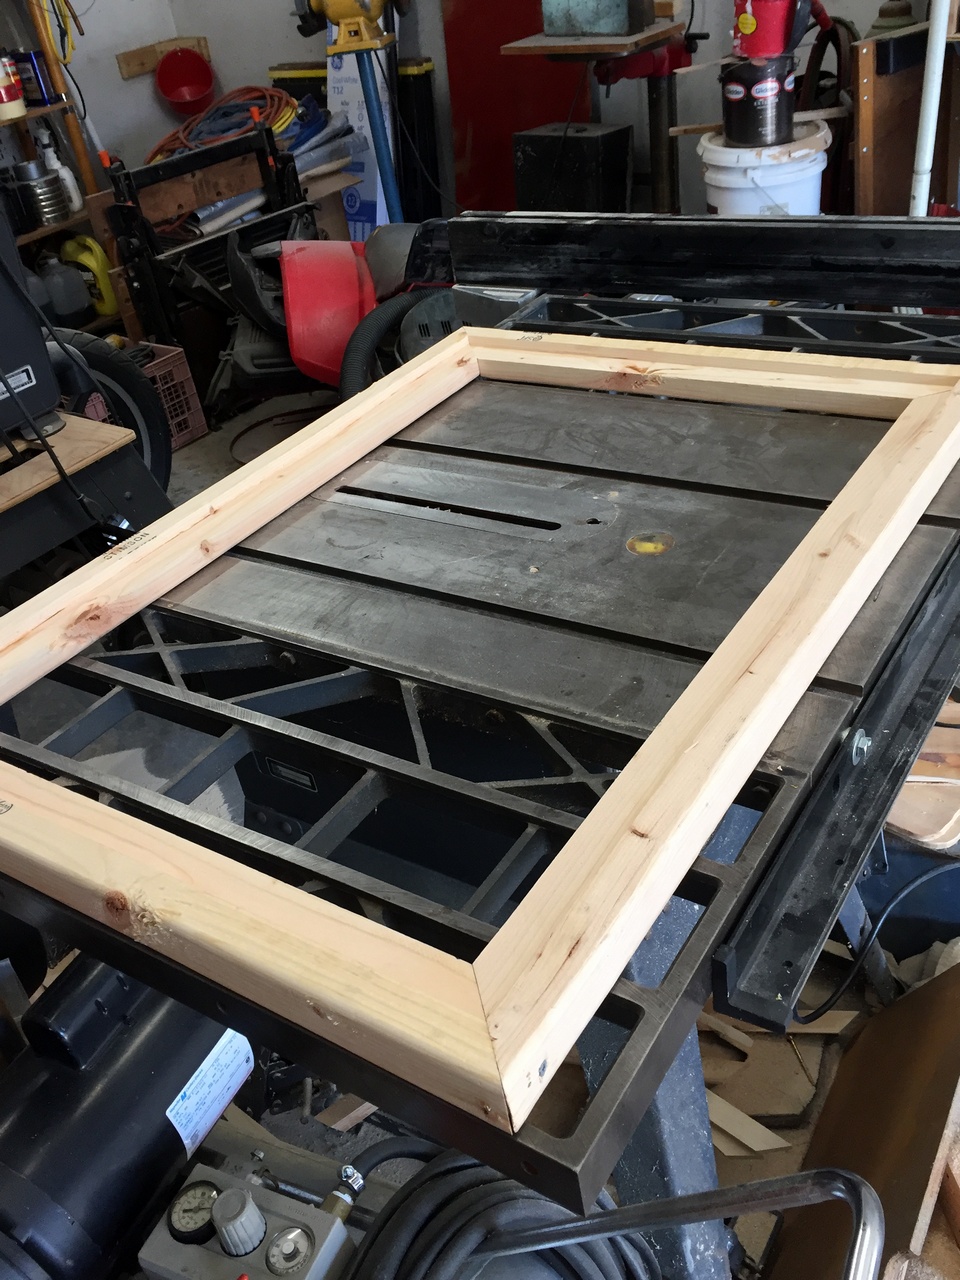
At this point I decided it was time to get the skylights built. I used 2x3's on the skylight tops instead of the 2x4's I used on the boxes. I wanted them to be light enough, but still sturdy. I built each box as if they were picture frames, with mitered corners. Because I wanted each skylight cap to overlap the box frame to help keep rain out, I then ran them each through the table saw to cut a relief into the bottom side. I glued them and stabbed together with my air brad-nailer to hold them, and added a screw for strength.

I cut out a piece of roofing for each of the skylights, placing the pattern so the overhanging sides were angled downward for water runoff. I cut a couple cleats out of scrap and placed them on the frame, using a closure to get the correct spacing.


It all looked good, so tacked the cleats down and painted all the new bare wood. When that was dry I tacked the foam closure strips in place with a couple teeny brads so they wouldn't move when I put the clear top over it and screwed everything down proper. Before attaching the clear top I mocked it up to mark off the hinge locations. I wanted them installed before the top due to clear panel overhang. Fairly happy with the fit, I put a coat of paint on it, and later I screwed the hinges and the clear panel both on.


I installed it and stood back to admire it--the first one! Still unsure of what I was going to use to latch them, I decided to go forward and complete the other three of them without design modification.


Here's what we've got so far. All skylights installed, and propped up with matching pieces of 2x4's holding them open. Not bad. I hope they don't drip too much in driving rainstorms...

The Door
Being someone that's not good at designing anything on my own, I opted to follow the Ana White Barn Door. I struggled a bit with the pictures on her website with regard to the layout or "layering" of the individual pieces for assembly. Once I started in working it, everything fell into place. Hopefully, my pictures will help someone see things easily.
I built each "layer" individually, using glue and screws. The inner layer is only the two 1x2's and the header, but it ends up being amazingly well put together if you can use a Kreg fixture and pocket screws. They really suck the pieces together tightly. I built the outer layer the same way--glued and screwed. Let me say at this point that you can't really have too may clamps during these operations--especially when you're using glue. Make sure you do mock-ups as you go, testing fit before applying glue. When you do the cross-beam on the outside of the door, be careful with your hole placement so you don't have a screw "break through" your project in a conspicuous place.


And here we have the assembled door. Notice the "extra" pocket holes? It pays to double-check your setup before drilling. I had the Kreg all set right except for one thing: I forgot to set the depth. The first few holes went 99% of the way through the wood. I didn't catch it at first because it didn't quite go all the way through the wood. Check and double-check so you don't screw up!

Door openings need to have cleats installed on the top and sides to keep them from "over-closing" and to give the latch a solid mounting place, and when I put the cleats in the doorway of the greenhouse and checked the door at this point I didn't like the fit. I made the door just a bit smaller than I should have in both dimensions. To compensate, I ended up adding a 1/2" filler strip to the top and the hinge side of the door. I was much happier with the door fit now. You can sort of see it in the next pictures.
Before I assembled the door I painted the portions with their two colors. I wasn't about to try to hand-paint that white 'X' after the door was assembled!


During the time I was finishing up the roof and skylights, we decided it was still a bit too hot inside--even with all the openings. (After all, we're talking July and August here.) The greenhouse was getting tons of ventilation, but we needed to limit the sunlight to keep all the plants from baking to death. I ordered a 50% shade cloth we could drape over it. I attached a couple hooks on the left side for the grommets, but it was a pain in the ass to get over my new, custom skylights due to the protruding fasteners. We got it up okay and it worked great.


5 comments:
It's the greatest greenhouse ever. It's the perfect size for my plants.
Thank you sweetie.
This is absolutely incredible!
Great design! We have wanted to build one for a few years now. I think we have our blueprint!
Has the skylights held up well? Any leaking?
No leaking from the skylights. I even ended up removing the weather-stripping I installed, as the overhang of the skylights negated the need for total sealing. No leaks--even without weather-stripping!
Post a Comment